Best served with plain white rice, bread or fried rice vermicelli, curry chicken is a Singaporean favourite and a must-have for every special family occasion. Made with fragrant coconut milk and a quintessential Southeast Asian spice mix called the rempah, its aromatic and flavourful gravy is one that will bring the whole family together for the upcoming holidays!
What you’ll need
For the Rempah (spice paste):
25 pcs dried chili
15 shallots
3 cloves garlic
1 inch turmeric
1 inch young ginger
For Curry Chicken
Rempah (above)
1 chicken (approx. 1.2kg)
3 tbsps curry powder
3 stalks lemongrass
500g potatoes
1 cinnamon stick
2 star anise
500ml coconut milk
900 ml water
How to make it:
Blanch chili in boiling water for 10 mins, drain and dry
Blend all ingredients in a food processor
Fry rempah in 3 tbsps oil until chili oil floats to surface and fragrant (small fire)
Marinate chicken with curry powder for at least 15 minutes
Add chicken and lemongrass to rempah and fry until chicken turns opaque on outside
Add potatoes, fry together until the gravy fully coats the potato
Dilute 300ml coconut milk with 500ml water, then add to the pan and cook until chicken and potatoes are tender.
Season with salt
Add rest of coconut milk and cook on medium until the curry boils
Serve with white Jasmine rice or crispy baguette!
(Note Salt should always be added before undiluted coconut milk to prevent any curdling.
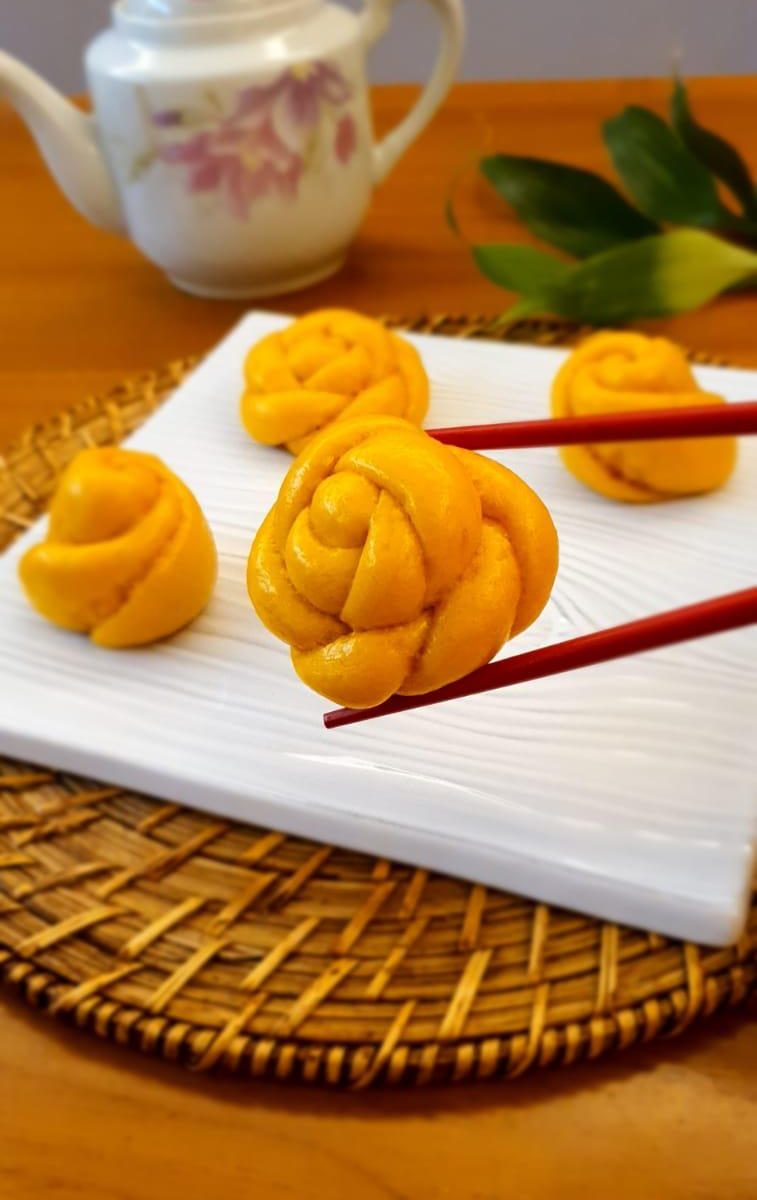
Are you looking for a new pumpkin recipe? Try these fluffy flower mantou (steamed buns), they are so pretty and full of pumpkin goodness!
The word “mantou” literally means “barbarians head”. They appear cloud-like in their form, first having originated from Northern China. Legend attributes its origin to the brilliant political strategist Zhuge Liang, who was attempting to capture a barbarian and led his army across a tumultuous river.
What you’ll need
350 g Hong Kong flour or cake flour
4g instant yeast
60g sugar
50ml warm water
200g mashed or puréed pumpkin
2 tsps coconut oil
How to make it
Dissolve sugar in warm water in small bowl, add the yeast and mix to incorporate. Let stand undisturbed for 10 mins or until the mixture turns foamy.
Place the mixture and other ingredients in a mixing bowl. Use the dough hook attachment and start kneading the dough. Depending on how much liquid is in the mashed pumpkin, you may need a bit more flour so the dough can come together into a non-sticky smooth dough or if the dough is too dry, you may add a bit water, tablespoon by tablespoon if needed. Knead the dough on medium speed for 5 minutes.
Cover and rest the dough for 15 minutes so it’s easier to knead.
Knead the dough. The dough should end up soft and supple, just like a baby’s bottom!
Leave kneaded dough in a deep bowl and cover. Let rise in a warm spot for 2-3 hours or until the dough almost triples in size.Punch the dough down. Sprinkle working surface lightly with flour and roll out the dough into a log, about 16 pieces. Shape each bun as desired – either into flowers or small balls.
Place each bun seam side down on paper liners and place into a steamer, leaving approx 2″ between the buns. Cover and let rise for 30 mins or until springy to the touch.
Steam over high heat for 15 mins. Serve hot and fluffy. Hao Chi!
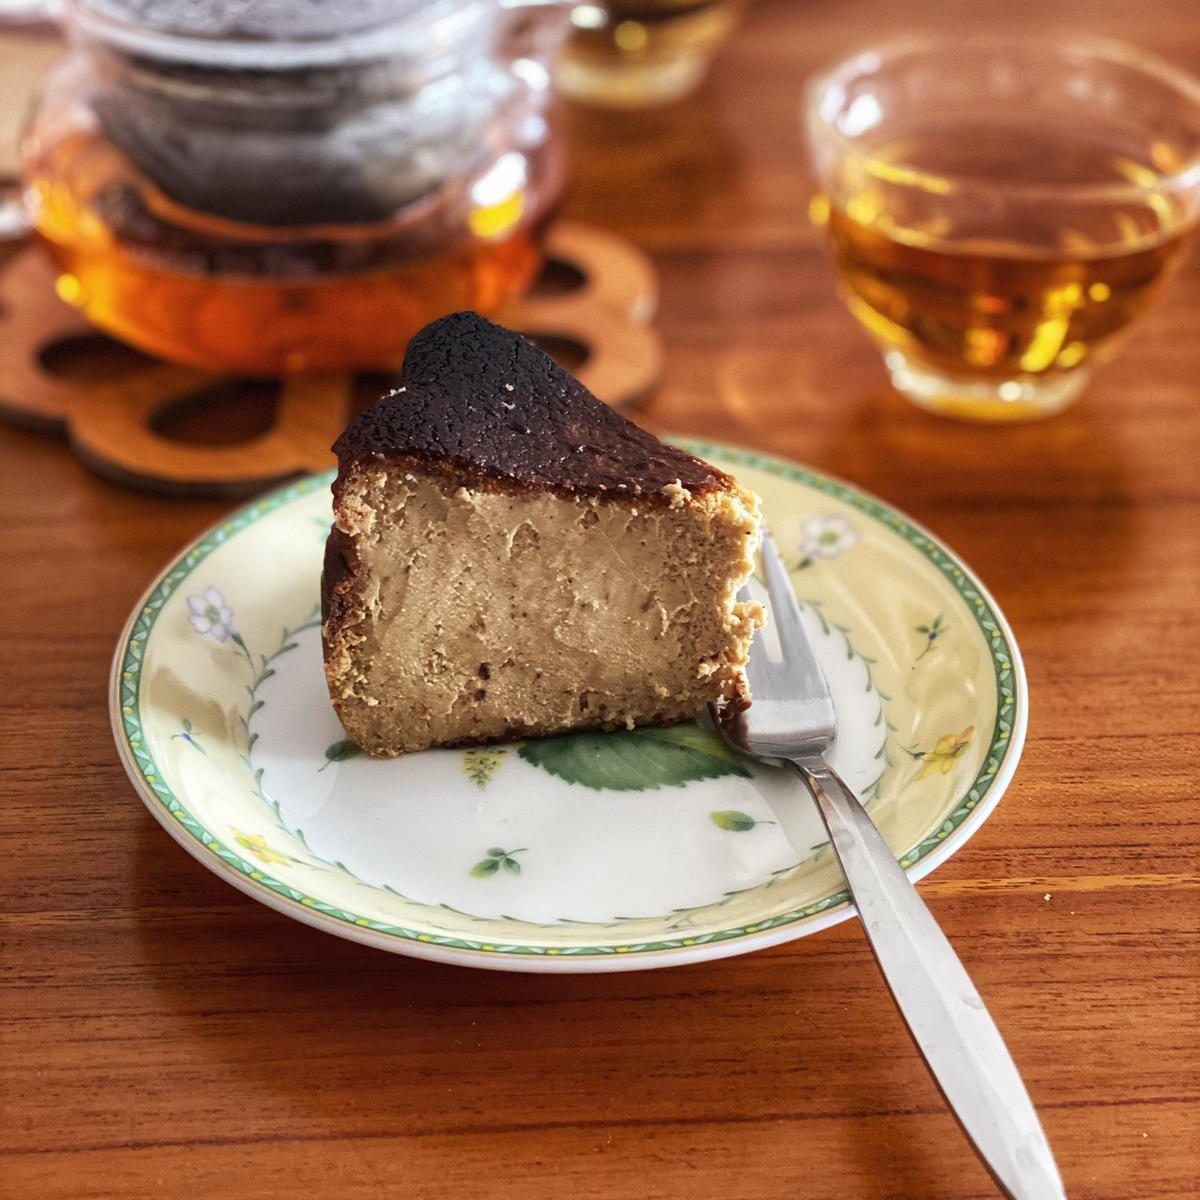
Wonderfully creamy and custardly, the Basque burnt cheesecake is a crustless cheesecake baked at high heat. It has a rustic look with cracked edges and an almost burnt surface.
While the original recipe from La Viña in San Sebastián contains only 5 ingredients, there’s plenty of room to get creative. This version uses brown sugar as well as Brie for an enhanced caramelly finish. You can also add matcha powder, cocoa powder, Camembert or Blue Cheese – so simply get creative and have some fun!
What you’ll need
400g cream cheese, room temperature
50g Brie
80g brown sugar
20g caster sugar
3 large eggs, room temp
200g heavy cream (35% fat)
1 tbsp cornflour
1 tbsp all purpose flour
1 tsp vanilla extract
1 tsp lemon juice
1 tbsp rum
How to make it
Line a 6” circle cake tin with 2 layers of baking paper and trimmed to have an overhanging amount of 1.5″-2″.
Beat sugar and cream cheese together on medium until smooth and there are no more clumps. Scrape the bowl.
Add eggs one at a time and beat on medium until smooth. Scrape the bowl again to ensure that nothing sticks to the sides for even mixing.
Add the rum, vanilla, lemon juice, cream and beat until just mixed. Sieve the flours into the mixture and mix to ensure it’s just combined.
Bake in convection oven at 220C/430F for at least 40 minutes, until top is dark amber and almost charred at parts but the middle is still jiggly.
Let cool in the tin fully on a wire rack at room temperature, then place in fridge to allow the cheesecake to set. Serve cold or at room temperature.
Note: If you prefer a more runny/molten centre, bake the cheesecake at 240C/470F for 30-35 minutes.
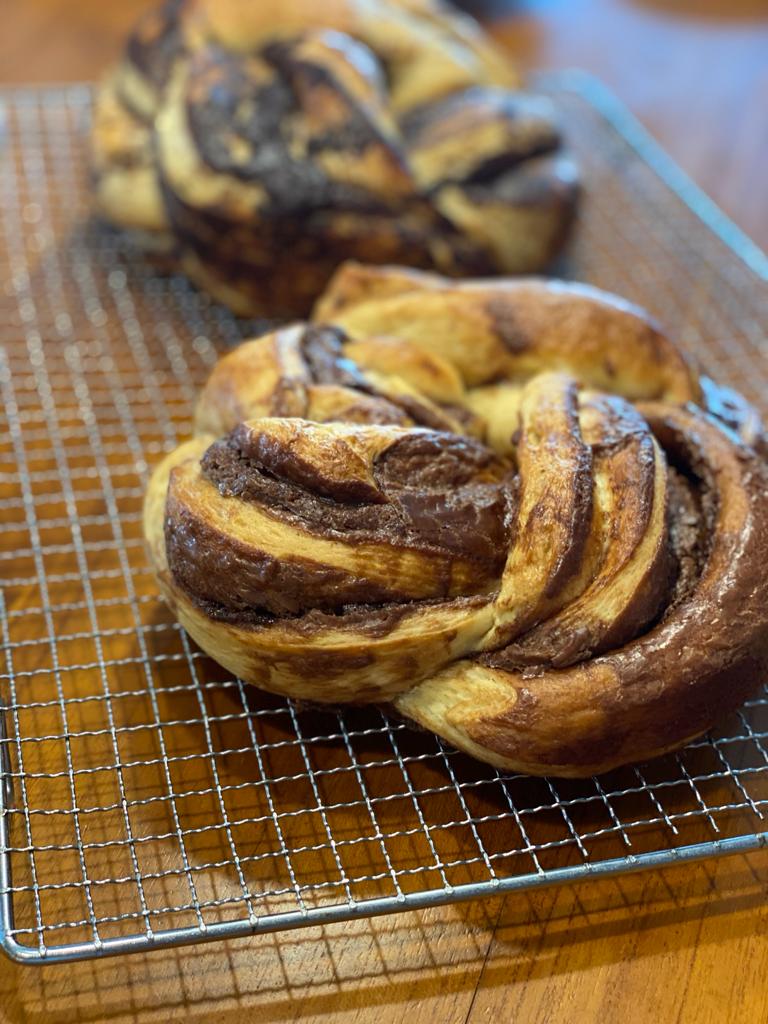
Babka is a sweet braided bread that originated from Jewish communities in Poland in the early 19th century. Extra challah dough was rolled up with fruit jam or cinnamon and the Babka was baked as a loaf alongside the challah then.
Fast forward to 2020, the modern day Babka consists of either an enriched or laminated dough, rolled out and spread with a variety of sweet fillings such as nutella, chocolate, cinnamon sugar, apples, poppy seeds, matcha and even sake kasu! It is sometimes topped with a crumb topping.
This is a recipe for Nutella Babka, and a variation for Matcha Sesame Babka (scroll all the way to the bottom!)
What you’ll need
1 cup + 2 Tablespoons whole milk, divided into two
2 teaspoons dry yeast
1/3 cup/70g granulated sugar
1/2 cup/115g unsalted butter, softened
2 large eggs, at room temperature and divided into 2
1/2 teaspoon salt
4 and 1/4 cups bread flour, plus more for dusting/rolling
2 cups (600g) Nutella, divided into 2 sets
How to make it
Heat 1 cup of milk to about 95 deg F/ 35 degC.
Pour the warm milk into the bowl of an electric stand mixer fitted with the dough hook attachment. Manually whisk in the yeast and 2 teaspoons of the granulated sugar. The mixture should be frothy and foamy after 5 minutes.
On low speed, beat in the remaining sugar and the softened butter until butter is slightly broken up. Next beat in 1 whole egg plus 1 egg yolk (reserve the egg white) and the salt. Gradually add the flour, then beat on medium speed for about 5-6 minutes until a soft dough forms.
Turn it out onto a lightly floured surface and form into a ball. Place into a large bowl, greased and cover with a damp towel. Place in a warm area to rise, till doubled in size, for about an hour.
Once doubled in size, punch down the dough to release any air bubbles. Remove dough from the bowl and turn it out onto a lightly floured surface. Punch down again to release any more air bubbles if needed. Using a sharp knife or dough scraper, cut dough in half. Work with only half of the dough at a time. Cover the dough you aren’t working with.
Generously grease two round 7-inch pans with butter or nonstick spray.
On a slightly floured work surface, start shaping the babka. Roll one dough half out into an approx. 9×13 inch rectangle. Spread with 1 cup of Nutella, leaving a 1/2 inch border uncovered.
Tightly roll the dough into a 13-inch log. Place the log on its seam. Using a sharp knife, cut the log in half lengthwise. Criss-cross one half, cut side down, on top of the other half– forming an X. Twist the two together then give the plait a quick roll to form a round dough.
Place in prepared loaf pan and cover with damp towel. Repeat with 2nd half of dough. This step can get a little messy – its normal!
Allow both shaped (and covered) loaves to rest for 10-20 minutes.
Meanwhile, preheat the oven to 350 deg F/ 180 deg C.
To make the eggwash, whisk the remaining 2 Tablespoons of milk with the leftover egg white. Using a pastry brush, brush the babka loaves with egg wash. Do the best you can as some Nutella is exposed.
Bake for 45-50 minutes or until babka is golden brown on top. Remove from the oven, place each pan on a wire rack, and allow to cool for 10 minutes before slicing and serving.
Cover and store leftover babka at room temperature for a couple days or in the refrigerator for 1 week. You can also freeze the baked babka for up to 3 months, then thaw overnight in the refrigerator. To serve, warm it up in the oven.
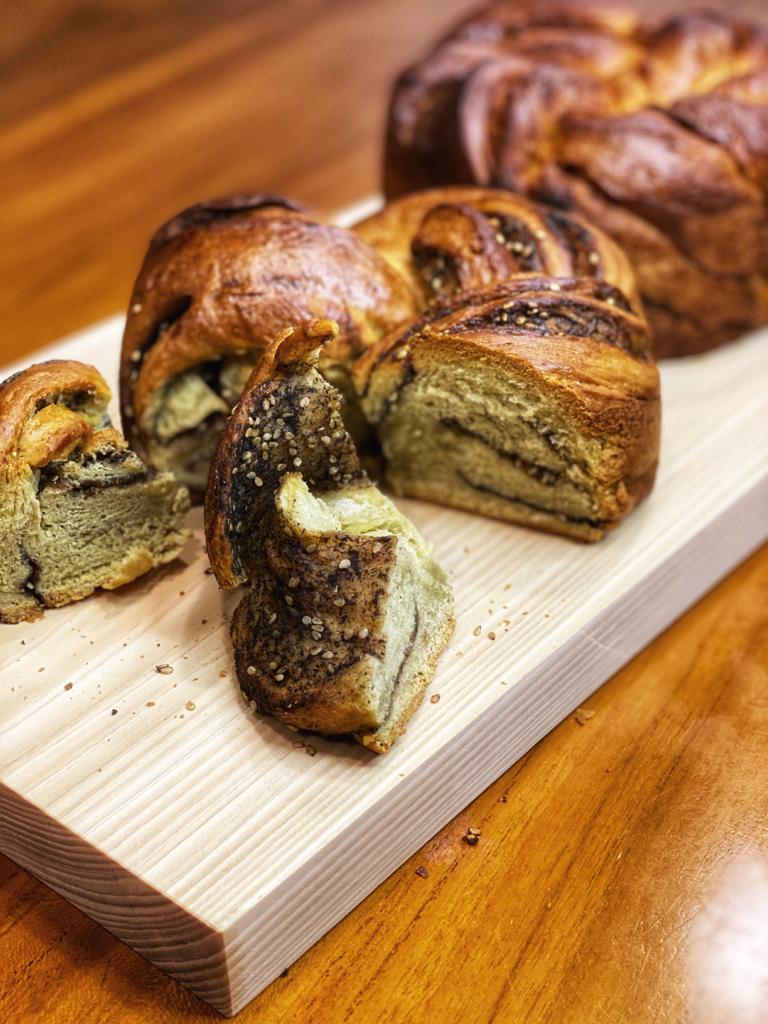
Matcha Sesame Babka
To make Matcha Sesame Babka, add 2 tbsps matcha powder to the flour in step 2. Instead of Nutella, make your black sesame filling with 1 cup ground black sesame, 1/2 cup sesame seeds and 2 tbsps brown sugar, then sprinkle on the dough before rolling it into a tight log (steps 7 and 8).
Chinese-style roast pork belly, or Siu Yuk, as it is more fondly known, has been a Southern Chinese delicacy for ages. Unlike the Western style cooking methods that require scoring of the skin, the Chinese crispy roast pork belly traditionally requires the pork skin to be pricked until it’s completely punctured with holes. This is an important step, ensuring a uniform crisp and a beautiful crust.
Absolutely mouthwatering, this is a perfect and fail-proof recipe — guaranteeing you crispy, crunchy, flavourful pork crackling, and melt-in-your-mouth pork belly.
What you’ll need
900g/2 lbs pork belly
6 cloves garlic
1 teaspoon coriander powder
1 teaspoon ginger powder
1 teaspoon white pepper powder
1 teaspoon four-spice powder
Coarse salt, for salt crust
How to make it
Preheat the oven to 350 deg F/180 deg C, fill a tray on the bottommost rack of your oven with water. The pork belly should be roasted on the lower-middle rack.
Dry the pork belly thoroughly.
Using a prickling tool, spike or knife, poke as many holes on the skin of the pork belly as possible.
Make some horizontal slits on the sides of the belly, then rub the meat side with the five spice powder, coriander powder, ginger powder and five-spice powder. Do not season the skin, just the meat will do.
Insert each garlic and push them deep inside the pork belly. Do make sure they go deep enough so they don’t drop out during the baking process.
Layer the top of the pork belly with the salt evenly.
Place the pork belly on a wire rack or directly on the lower middle rack, and roast for 1 hour. While baking, the oil will drip to the pan at the bottom that has already been filled with with water.
Bake until the salt crust forms. Check water in the pan periodically and add more if needed.
After an hour or when the salt crust has formed, remove the pork belly from the oven, pull off the salt crust and discard.
Raise the heat of oven to 465 deg F/240 deg C.
Place the pork belly back in the oven and roast for another 40 minutes. (monitor closely – if it’s not crispy enough, roast for 5-10 minutes more, or if it browns too quickly, remove from oven earlier)
Remove from oven and let set for 10 minutes.
Serve with mustard (traditional dip) and to elevate the roast further, include flavoured salts and dips such as yuzukosho. Enjoy!
Notes:
Using coarse salt is important to prevent too much salt from permeating into the pork skin.
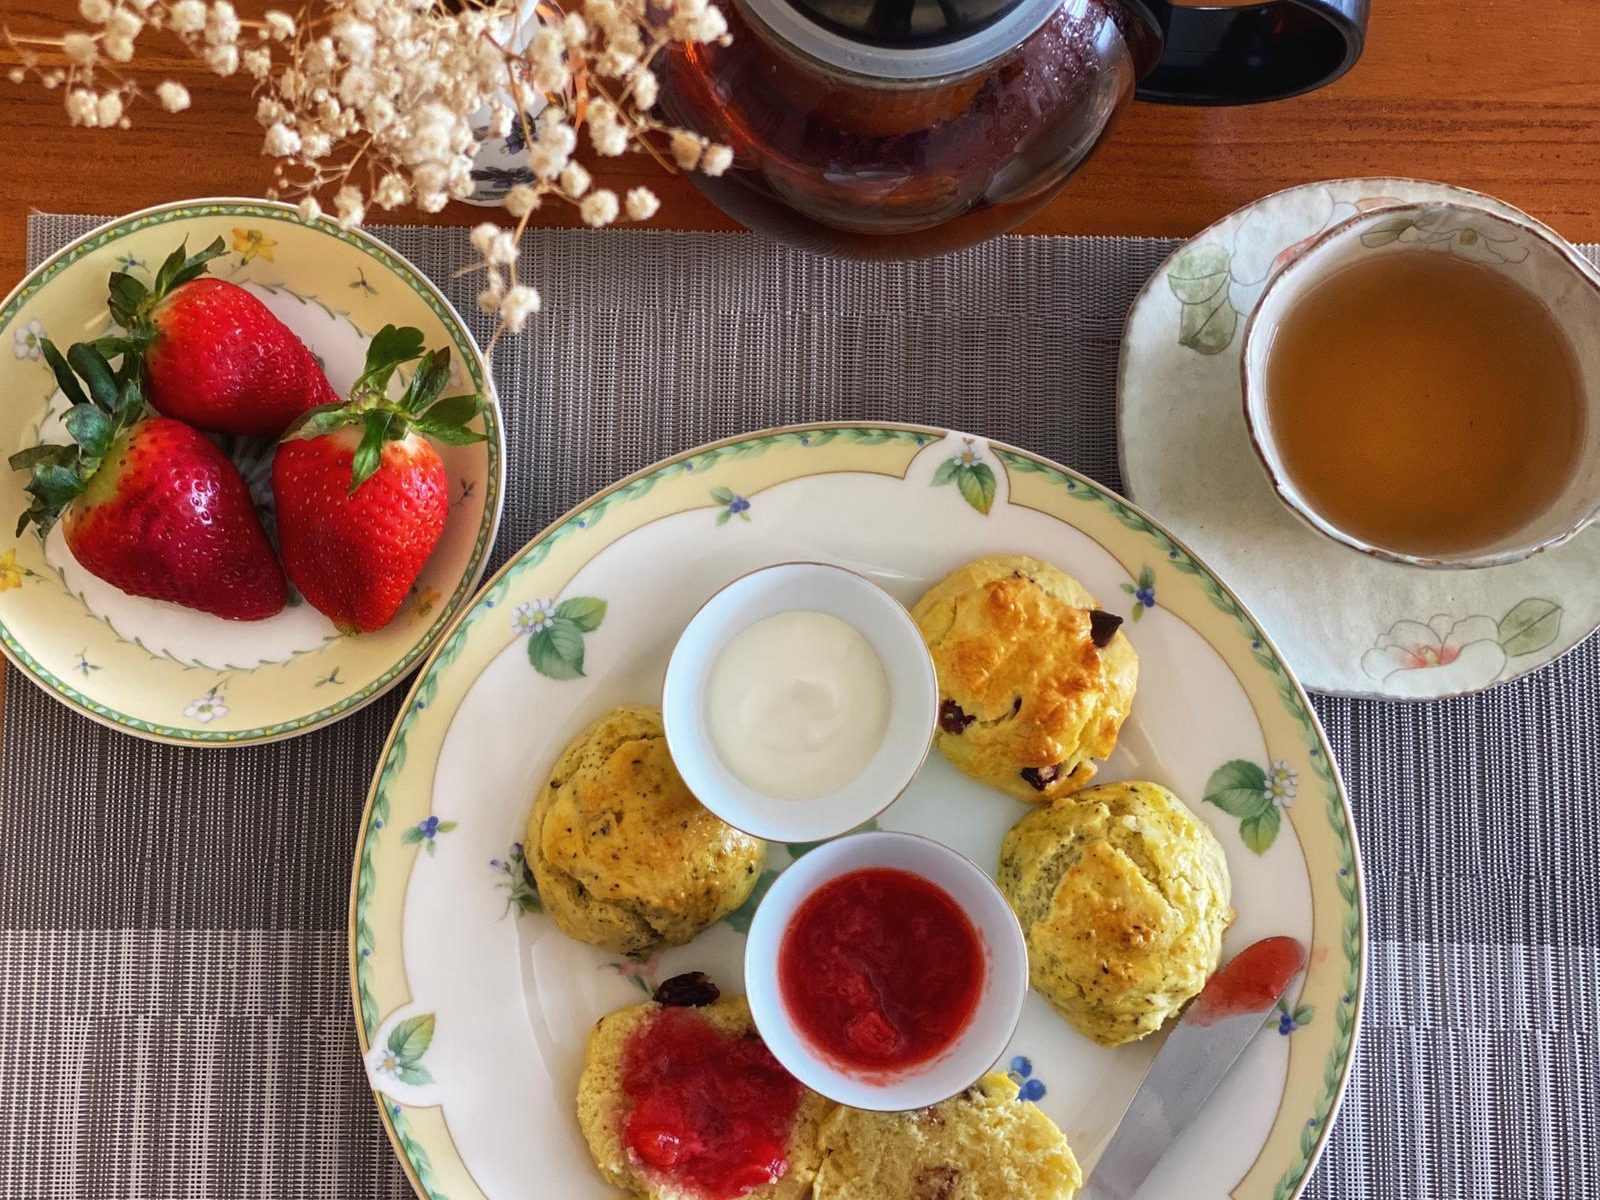
Originally made with oats and griddle-baked, it is believed that scones got their start as a Scottish quick bread in the early 1500s. Some say the word “skone” originated from the Dutch word ‘schoonbrot’, which means beautiful bread, while others argue it comes from Stone of Destiny, where the Kings of Scotland were crowned.
When it comes to flavour variations, the possibilities are endless, so feel empowered to explore your favourite (preferably dry) ingredients! The important thing is to keep in mind are that all ingredients should be cold (e.g. use chilled or frozen butter) for a better rise, and don’t overdo the mixing because crumbly scones are best!
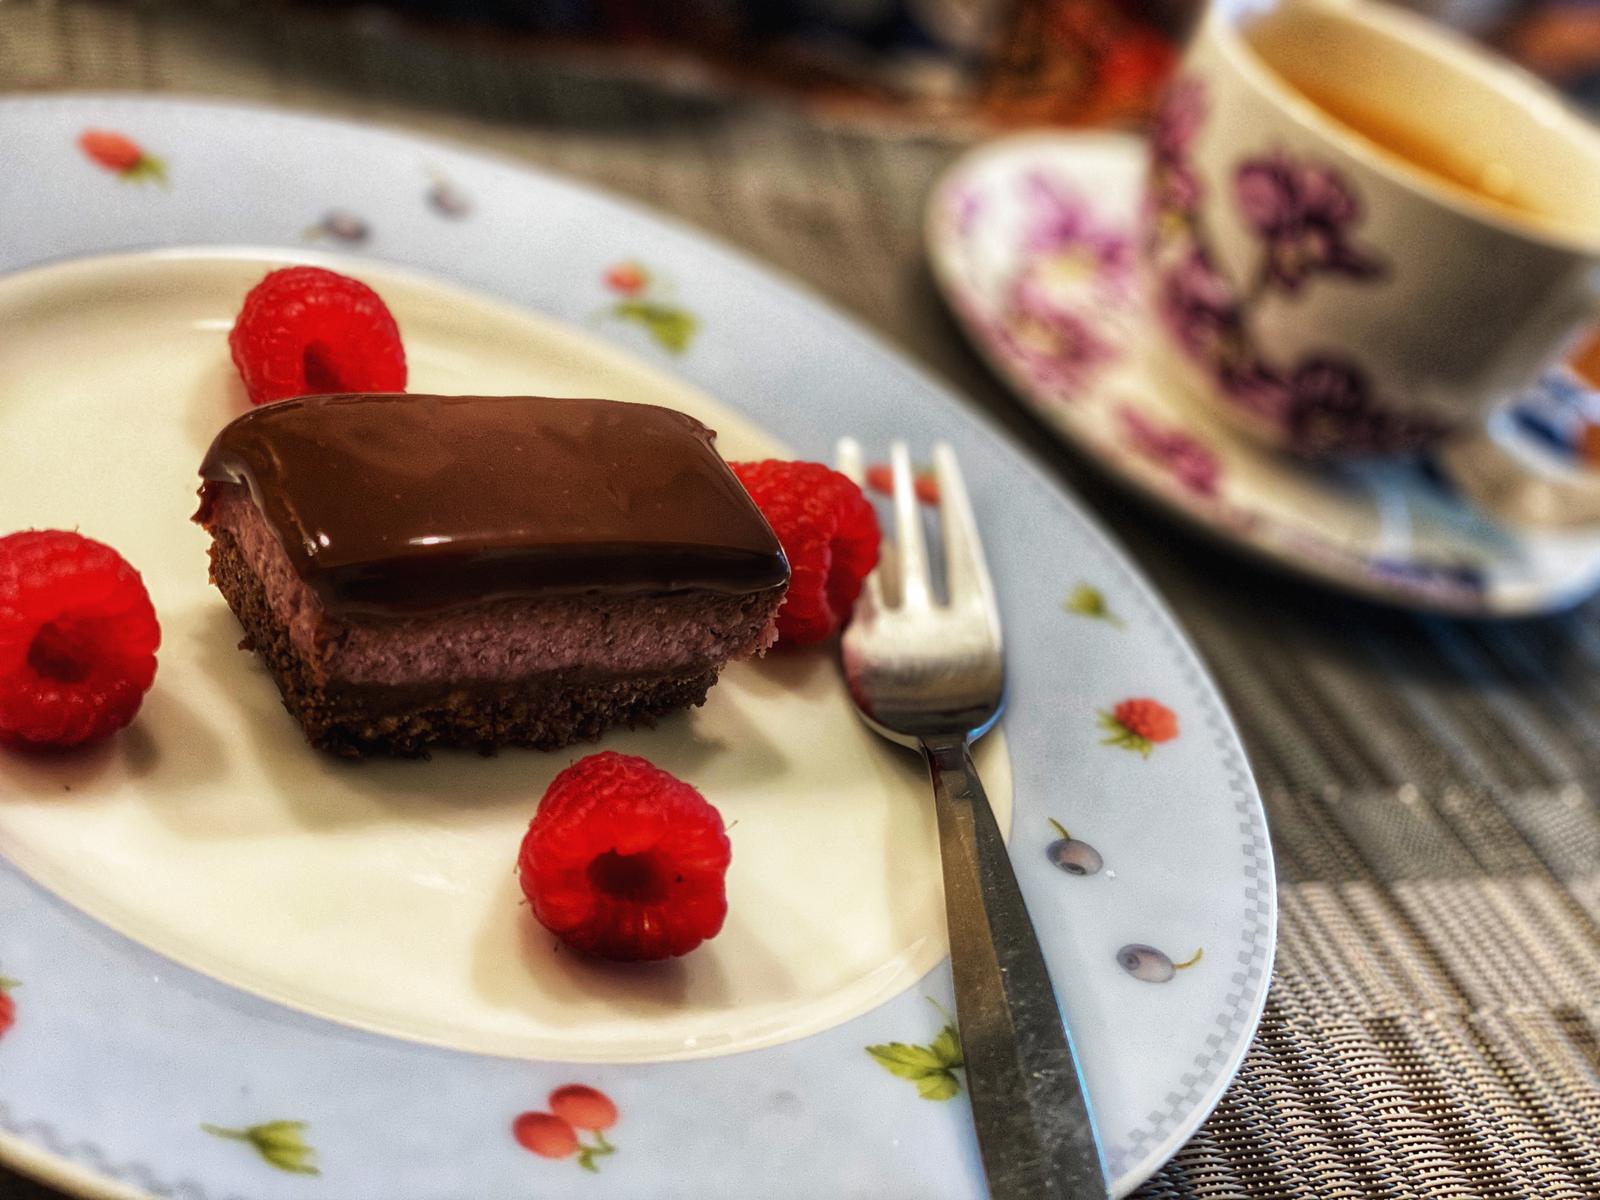
A delightful dessert combination, this is a fairly simple no-bake recipe that promises flavour in every bite! Made of a chocolate base, a raspberry layer and a chocolate ganache layer, the indulgent pairing of chocolate and raspberry is phenomenal. Just watch how quickly it disappears!
What you’ll need
Chocolate Base
1 cup crushed digestive biscuits
1/3 cup raw cacao powder
3 tablespoons coconut oil, melted
Raspberry Layer
1/2 cup raspberry jam
2/3 cup ground almonds
4 tablespoons dessicated coconut coconut
4 tablespoons pure maple syrup or honey
1 tablespoon coconut oil, melted
Chocolate Ganache Layer
1/2 cup heavy cream
1/2 cup/75g/2.5oz 70% dark chocolate
How to make it
Chocolate base layer: add the base ingredients to a high speed blender or food processor and blend until it resembles fine crumbs and sticks together when pressed. Spoon mixture into a lined slice tin and press down with the back of a spoon. Place it in the freezer.
Raspberry layer: blend all raspberry layer ingredients except the coconut oil in a high speed blender until smooth. Add coconut oil and blend until well combined. Add to the base and smooth over with a spatula or back of a spoon and place into the freezer for at least 1 hour to set.
Chocolate ganache layer: Break dark chocolate into small pieces. Heat the cream in saucepan on low heat until bubbles appear at the side. Pour over the chocolate, let stand for 5 minutes, then using a hand whisk, blend until completely mixed. Let cool completely, then pour the chocolate on top of the raspberry layer. Place back into the freezer and let it set completely.
Remove from the tin, slice with a hot knife, and serve. Store in freezer, in an airtight container.
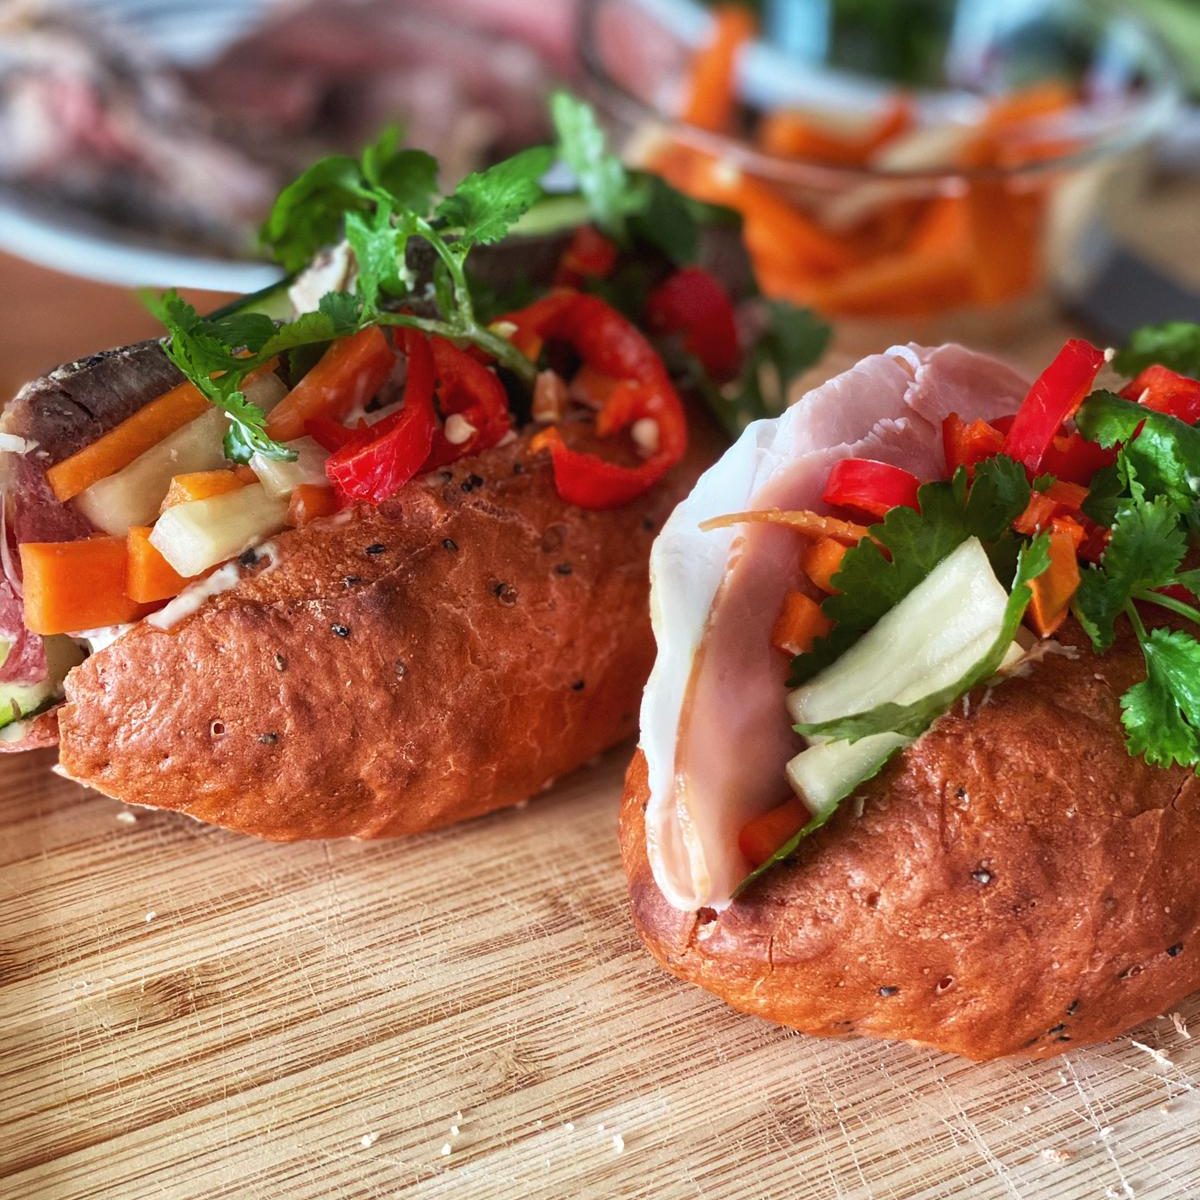
In February 2020, a bakery in Vietnam created a series of pink dragonfruit bread to use up the tons of dragonfruit going unsold due to the COVID-19 outbreak.
This exceptional dragon fruit Bahn Mi combines the subtle hint of floral sweetness, rich, savoury meat and bright, crunchy pickles and fresh herbs, all stuffed into a stunning pink baguette!
What you’ll need
For Pink Dragonfruit Baguette (makes 4:
250g plain flour
1 ½ teaspoon instant dry yeast
1 tablespoon sugar
1 teaspoon salt
160g pink dragonfruit, peeled, cut and mashed
For Daikon and Carrot Pickles (Do Chua):
1 large carrot, peeled and cut into thick matchsticks
450g/1 pound daikon, no larger than 2 inches in diameter, peeled and cut into thick matchsticks
1 teaspoon salt
2 teaspoons plus 1/2 cup sugar
1 1/4 cups distilled white vinegar
1 cup lukewarm water
For Bahn Mi:
2 pink dragonfruit baguette
3 tbsp pate
3 tbsp mayonnaise
2-4 slices roast beef
2-4 slices ham
Daikon and carrot pickles (Do Chua)
3/4 cup fresh coriander/cilantro sprigs
Half a cucumber, finely sliced lengthwise into long strips
1 red chilli, finely sliced
How to make it
For Pink Dragonfruit Baguette:
In a mixing bowl of stand mixer, combine the yeast, sugar and mashed pink dragonfruit. Stir well to dissolve. Add half of the flour (125 g) and stir well to create a thick mixture with consistency of pancake batter. Cover and leave it in a warm place for 2-3 hours, until bubbles appear all over.
Add the rest of the flour and salt to the starter dough and using the dough hook on a stand mixer, knead until the dough comes together and elastic – around 10 to 15 minutes. If the dough too dry or wet, add 1 tablespoon of water or flour at a time.
Cover with kitchen towel and rest dough in a warm place (35-37 deg C or 95-98 deg F) for 1 hour or until it doubles in size.
Carefully transfer the dough onto the working surface. Try not to deflate it. With a scrapper or knife, divide the dough into 4 equal portions (each portion should weigh about 100g). Twist each portion inside out and form into a ball. Cover with kitchen towel and rest for 10 minutes.
Portion by portion, roll out with a rolling pin into round shape. Roll it and pinch the edges together. Place both hands on top of the dough, roll it back and forth on the counter, applying more pressure on your baby fingers than your thumbs to shape it into banh mi (wider in middle and thinner at both ends).
Place the shaped dough on a baguette pan and cover with kitchen towel. Let rest for another hour until doubled in size.
Preheat oven and the baking tray at 230 deg C/450 deg F for at least 15 minutes before baking. Place a tray of hot water at the bottom of the oven.
Score the baguette with a sharp knife, bread lame or razor blade and bake immediately.
Spray water on both sides of the oven and on the dough.
Bake for 20-25 minutes at 230 deg C/450 deg F in the middle of the oven. After the first 8 to 10 minutes, spray water on the baguettes and rotate the baguette pan to bake the baguettes evenly.
When the baguettes are done, turn the oven off and leave them in the oven for another 8 to 10 minutes. Cool on a rack.
For Carrot and Daikon Pickles (Do Chua):
Place the carrot and daikons in a bowl and sprinkle with the salt and 2 teaspoons of the sugar. Knead the vegetables for a few minutes, expelling the water from them. As they, soften, liquid will pool at the bottom of the bowl. Stop kneading when you can bend a piece of daikon so that the ends touch but the daikon does not break. Drain in a colander and rinse under cold running water, then press gently to expel extra water. Return the vegetables to the bowl if you plan to eat them soon, or transfer them to a 1-quart jar for longer storage.
To make the brine, in a bowl, combine the 1/2 cup sugar, the vinegar, and the water and stir to dissolve the sugar. Pour over the vegetables. The brine should cover the vegetables. Let the vegetables marinate in the brine for at least 1 hour before eating. Store in the fridge for up to 4 weeks.
To assemble the Bahn Mi:
Split rolls down the centre of the top.
Spread 1.5 tbsp pate on one side, then 1.5 tbsp mayonnaise over the pate.
Layer in the meats with cucumber slices.
Stuff in plenty of pickled carrots and daikon, and coriander sprigs.
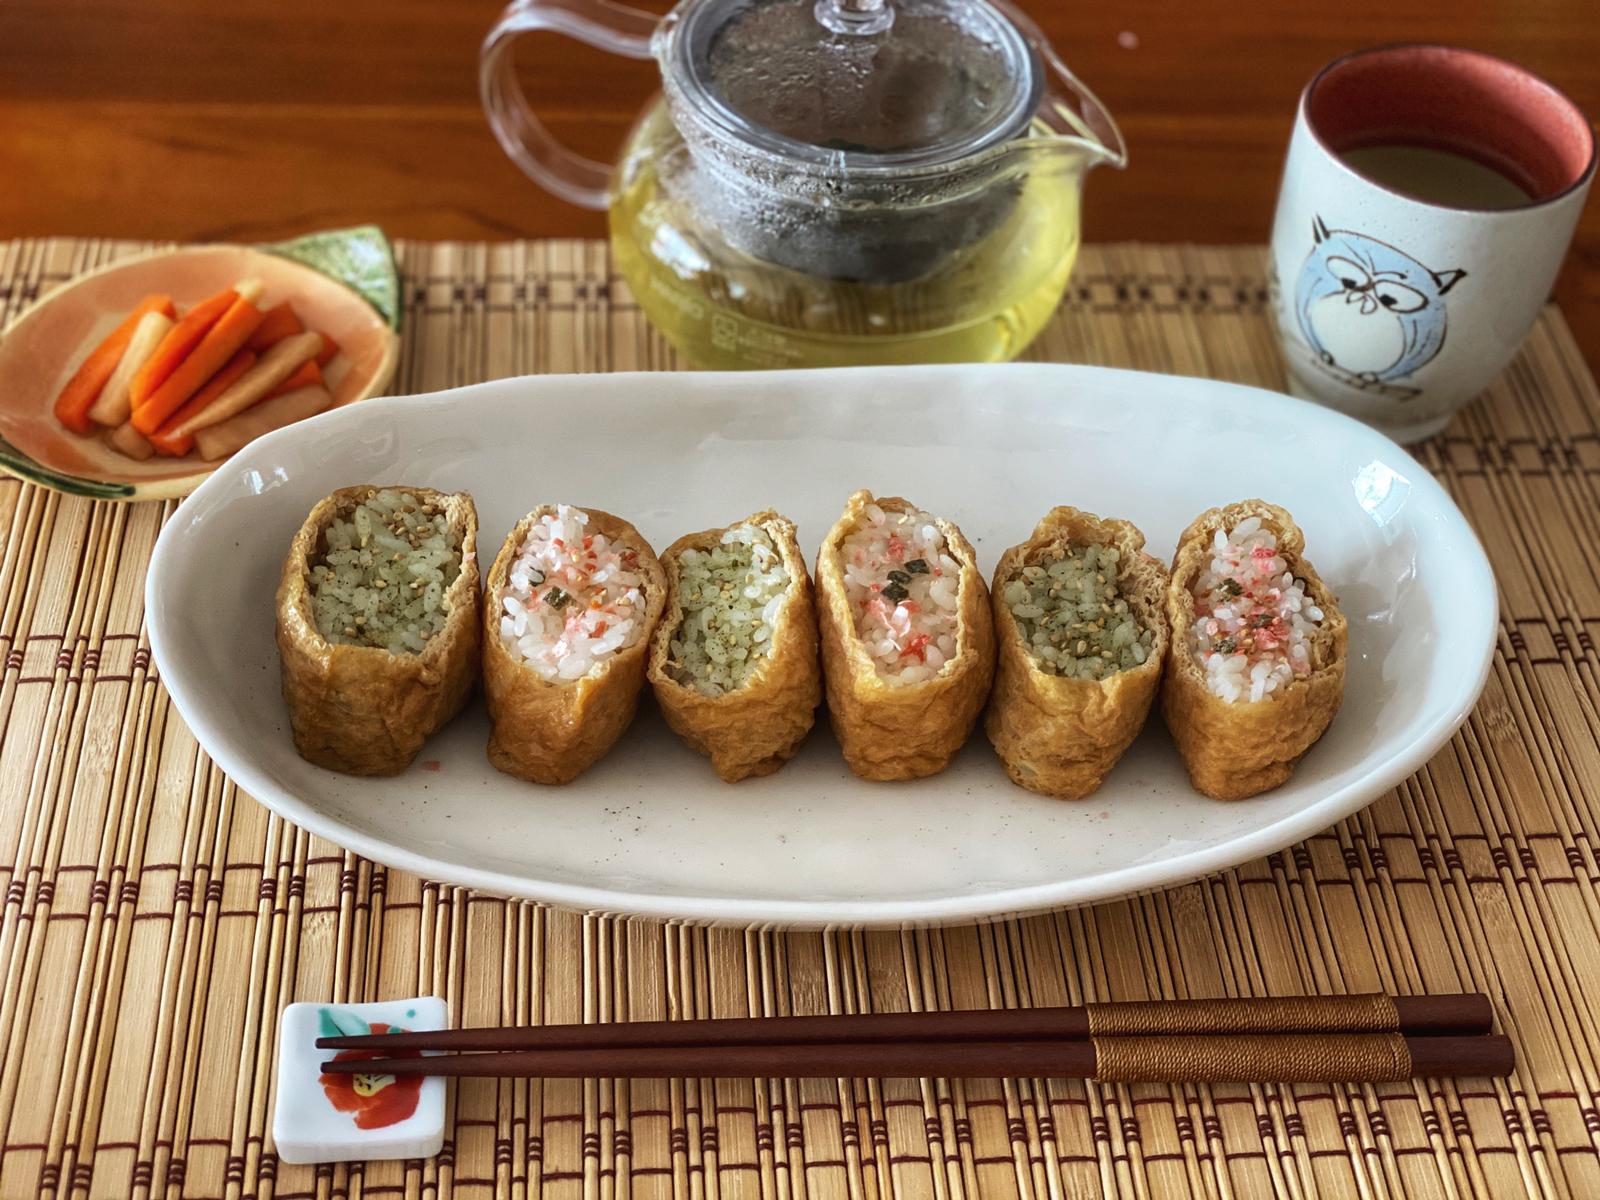
Legend has it that Inari, the Japanese Shinto god of harvests, uses foxes as his messengers. It is believed that these messenger foxes enjoy eating fried tofu skin, which gave birth to the popular snack inarizushi (fried tofu pockets stuffed with rice).
Often used as an offering at the altar of Inari shrines, the shape of inarizushi is either rectangular (eastern Japan) to represent rice bags offered at Inari shrines, or triangular (western Japan) to represent a fox’s ear.
With flavoured salts, you can put a fun spin while adding some colour to the traditional inari!
What you’ll need
(4 servings)
For Sushi Rice:
2 1/2 cups short-grain rice
560ml water
2-inches konbu kelp
2 tbsps white sesame seeds
5 tbsps rice vinegar
2 tbsps sugar
1/2 tsp flavoured salt of your preference (e.g. for matcha salt, use 1 part matcha powder to 3 parts salt)
For Inari pockets:
10 fried tofu puffs (aburaage)
4 tbsps soy sauce
4 tbsps sugar
2 tbsps mirin
1 cup water
How to make it
Sushi Rice:
Wash the rice and drain in a sieve for 30 minutes
Place the drained rice, water and konbu kelp in a pot or rice cooker, and cook the rice.
Heat the vinegar briefly then combine with sugar and salt.
Place cooked rice in a large bowl and spread. Pour seasoning over rice and mix in gently or thoroughly, while fanning the rice to evaporate excess moisture. Sprinkle sesame seeds over rice and set aside to cool.
Inari Pockets:
Immerse fried tofu puffs (aburaage) in boiling water, drain and squeeze out excess water.
Cut them into two width wise and open up the middle so they become pockets.
Combine soy sauce, sugar, mirin and water in a saucepan, and simmer over medium-low heat for 10 minutes or until the liquid disappears. Set aside to cool.
When the rice is cool, shape into balls and stuff into inari pockets.
Despite its name, the Swiss Roll (also known as jelly roll, jam roll, roll cake, cream roll or Swiss log) did not originate from Switzerland but likely from Austria. From classic fruit jam, whipped cream, chocolate and cheese fillings, to more exotic fillings made with ube and durian, different countries have their favourite interpretations of this sponge cake roll.
This light and luscious Chocolate Almond Roll combines a simple 3-ingredient Swiss Roll sponge recipe with a delicious chocolate almond butter.
What you’ll need
For the Swiss Roll Sponge:
3 Eggs
60g Castor sugar
50g All Purpose Flour, sifted twice
For the Chocolate Almond Butter Filling:
1 cup raw almonds
1/3 cup milk chocolate chips
1 teaspoon coconut oil
1 tablespoon cocoa powder
1 tablespoon honey
1 pinch sea salt
For the Topping:
50g dark chocolate, broken into small pieces
1 tbsp ground raw almonds
How to make it
Swiss Roll Sponge:
Preheat oven to 200 deg C/400 deg F. Line a 28cm x 28cm flat square cake pan with parchment or baking paper.
Using a clean bowl, beat eggs with a whisk, then add sugar. Place bowl over a double boiler and mix well.
While egg mixture is warm, beat the mixture in a mixer on high speed with whisk attachment, until light and fluffy. Reduce speed to low and continue beating for a minute. This will stabilise the volume of the egg mixture and ensure less volume is lost when you fold in the flour later.
Gently fold in sifted flour with a spatula, turning the bowl continuously and scooping the mixture up from the centre and bottom of the bowl. Fold until the mixture becomes glossy. Take care not to overmix the batter.
Pour batter into pan and spread evenly with a scraper. Place cake pan on a tray and bake for 10-12 minutes. Baking the sponge on an additional tray will prevent the bottom of the sponge from browning too quickly.
When Swiss Roll sponge is done, remove from oven, leave to cool slightly in pan, then and place in a plastic bag while it’s still warm to retain moisture. Alternatively, place a kitchen towel over it, and roll it up and set aside.
Chocolate Almond Butter Filling:
Toast almonds, then add to a food processor and process for 10-15 minutes, scraping down the sides as necessary. At this point the almonds should start to clump together. Continue to process until you reach a buttery consistency consistency. I always process until my almond butter is liquid like.
Melt chocolate chips in the double boiler.
Add chocolate, cocoa powder, honey, and sea salt to almond butter and process again until smooth.
Assembling the Cake:
Turn cool sponge onto a clean work surface. Peel off the parchment paper from the bottom of the sponge.
Spread the chocolate almond butter in an even layer over the sponge, leaving 1-1.5cm all around the border.
Gently roll up the sponge to make Swiss roll.
Melt the dark chocolate in the double boiler.
Drizzle melted chocolate over the Swiss roll, top with ground almonds.
Chill in the fridge for a few hours to allow the Swiss roll to set. Slice into pieces and tuck in!