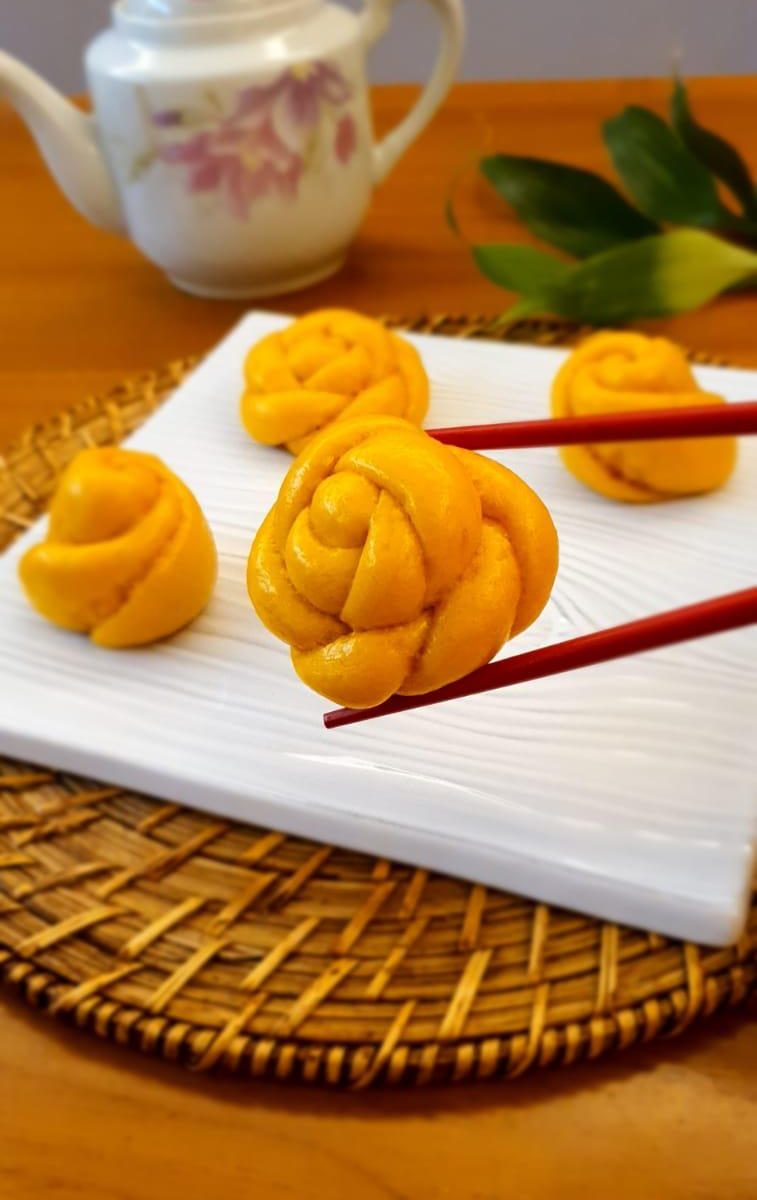
Pumpkin Flower Mantou (Vegan)

Are you looking for a new pumpkin recipe? Try these fluffy flower mantou (steamed buns), they are so pretty and full of pumpkin goodness!

The word “mantou” literally means “barbarians head”. They appear cloud-like in their form, first having originated from Northern China. Legend attributes its origin to the brilliant political strategist Zhuge Liang, who was attempting to capture a barbarian and led his army across a tumultuous river.

What you’ll need

  • 350 g Hong Kong flour or cake flour
  • 4g instant yeast
  • 60g sugar
  • 50ml warm water
  • 200g mashed or puréed pumpkin
  • 2 tsps coconut oil

How to make it

  1. Dissolve sugar in warm water in small bowl, add the yeast and mix to incorporate. Let stand undisturbed for 10 mins or until the mixture turns foamy.
  2. Place the mixture and other ingredients in a mixing bowl. Use the dough hook attachment and start kneading the dough. Depending on how much liquid is in the mashed pumpkin, you may need a bit more flour so the dough can come together into a non-sticky smooth dough or if the dough is too dry, you may add a bit water, tablespoon by tablespoon if needed. Knead the dough on medium speed for 5 minutes.
  3. Cover and rest the dough for 15 minutes so it’s easier to knead.
  4. Knead the dough. The dough should end up soft and supple, just like a baby’s bottom!
  5. Leave kneaded dough in a deep bowl and cover. Let rise in a warm spot for 2-3 hours or until the dough almost triples in size.Punch the dough down. Sprinkle working surface lightly with flour and roll out the dough into a log, about 16 pieces. Shape each bun as desired – either into flowers or small balls.
  6. Place each bun seam side down on paper liners and place into a steamer, leaving approx 2″ between the buns. Cover and let rise for 30 mins or until springy to the touch.
  7. Steam over high heat for 15 mins. Serve hot and fluffy. Hao Chi!

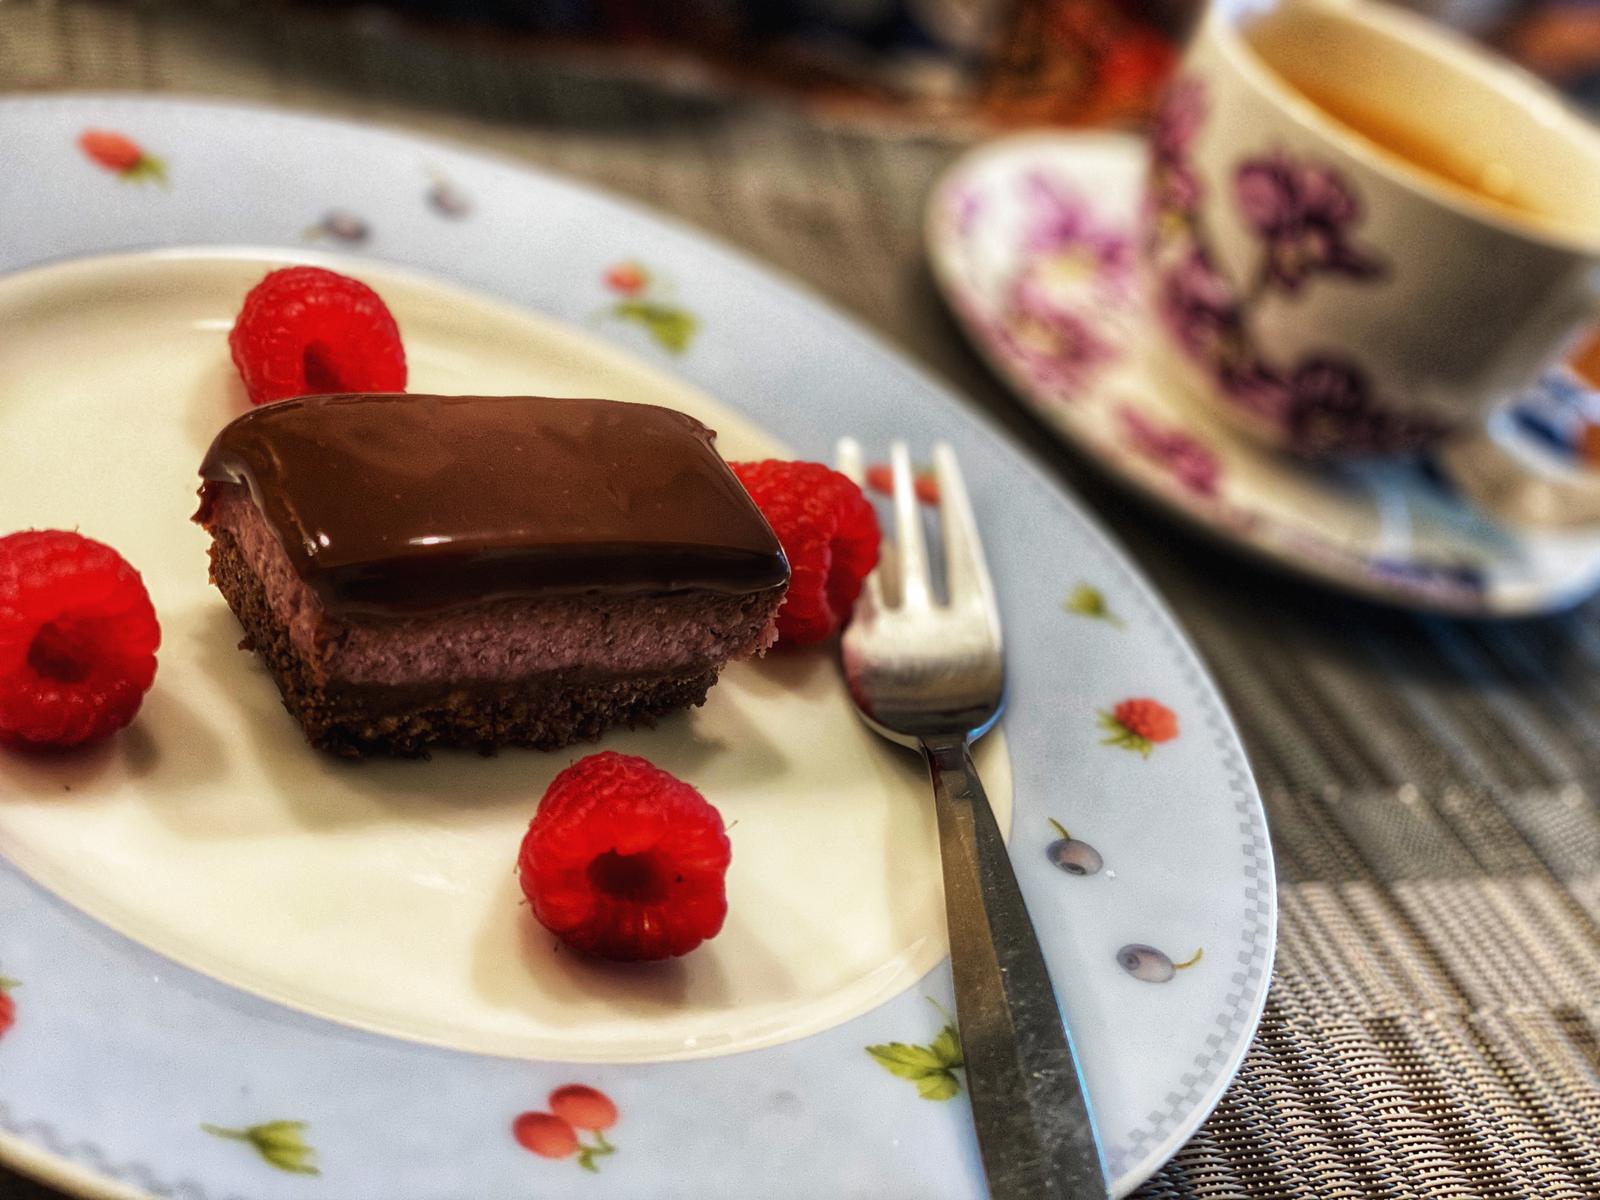
No Bake Chocolate Raspberry Slice

A delightful dessert combination, this is a fairly simple no-bake recipe that promises flavour in every bite! Made of a chocolate base, a raspberry layer and a chocolate ganache layer, the indulgent pairing of chocolate and raspberry is phenomenal. Just watch how quickly it disappears!

What you’ll need

Chocolate Base

  • 1 cup crushed digestive biscuits
  • 1/3 cup raw cacao powder
  • 3 tablespoons coconut oil, melted

Raspberry Layer

  • 1/2 cup raspberry jam
  • 2/3 cup ground almonds
  • 4 tablespoons dessicated coconut coconut
  • 4 tablespoons pure maple syrup or honey
  • 1 tablespoon coconut oil, melted

Chocolate Ganache Layer

  • 1/2 cup heavy cream
  • 1/2 cup/75g/2.5oz 70% dark chocolate

How to make it

  1. Chocolate base layer: add the base ingredients to a high speed blender or food processor and blend until it resembles fine crumbs and sticks together when pressed. Spoon mixture into a lined slice tin and press down with the back of a spoon. Place it in the freezer.
  2. Raspberry layer: blend all raspberry layer ingredients except the coconut oil in a high speed blender until smooth. Add coconut oil and blend until well combined. Add to the base and smooth over with a spatula or back of a spoon and place into the freezer for at least 1 hour to set.
  3. Chocolate ganache layer: Break dark chocolate into small pieces. Heat the cream in saucepan on low heat until bubbles appear at the side. Pour over the chocolate, let stand for 5 minutes, then using a hand whisk, blend until completely mixed. Let cool completely, then pour the chocolate on top of the raspberry layer. Place back into the freezer and let it set completely.
  4. Remove from the tin, slice with a hot knife, and serve. Store in freezer, in an airtight container.

Black Glutinous Rice Dessert – 3 Ways

Black glutinous rice, also known as black sticky rice, is the unpolished, whole grain of traditional sticky white rice. Despite its name, the colour of the rice is a deep, dark purple.

It has a nutty, chewy texture and has a natural sweetness. Unlike common white rice varieties, black rice is unprocessed, and healthier with more nutritional benefits. Its fibre-rich bran aids digestion, and it’s got more antioxidants and vitamin E compared to a similar amount of blueberries. Its deep purple hue contains anthocyanins, a powerful agent in fighting cancer and heart disease.

Usually enjoyed as a sweetened dish served with coconut milk in Southeast Asia, black glutinous rice commonly exists in the form of Bubur Pulut Hitam (black glutinous rice porridge) in Indonesia, Malaysia and Singapore, and Khao Neow Dam (black sticky rice) in Thailand.

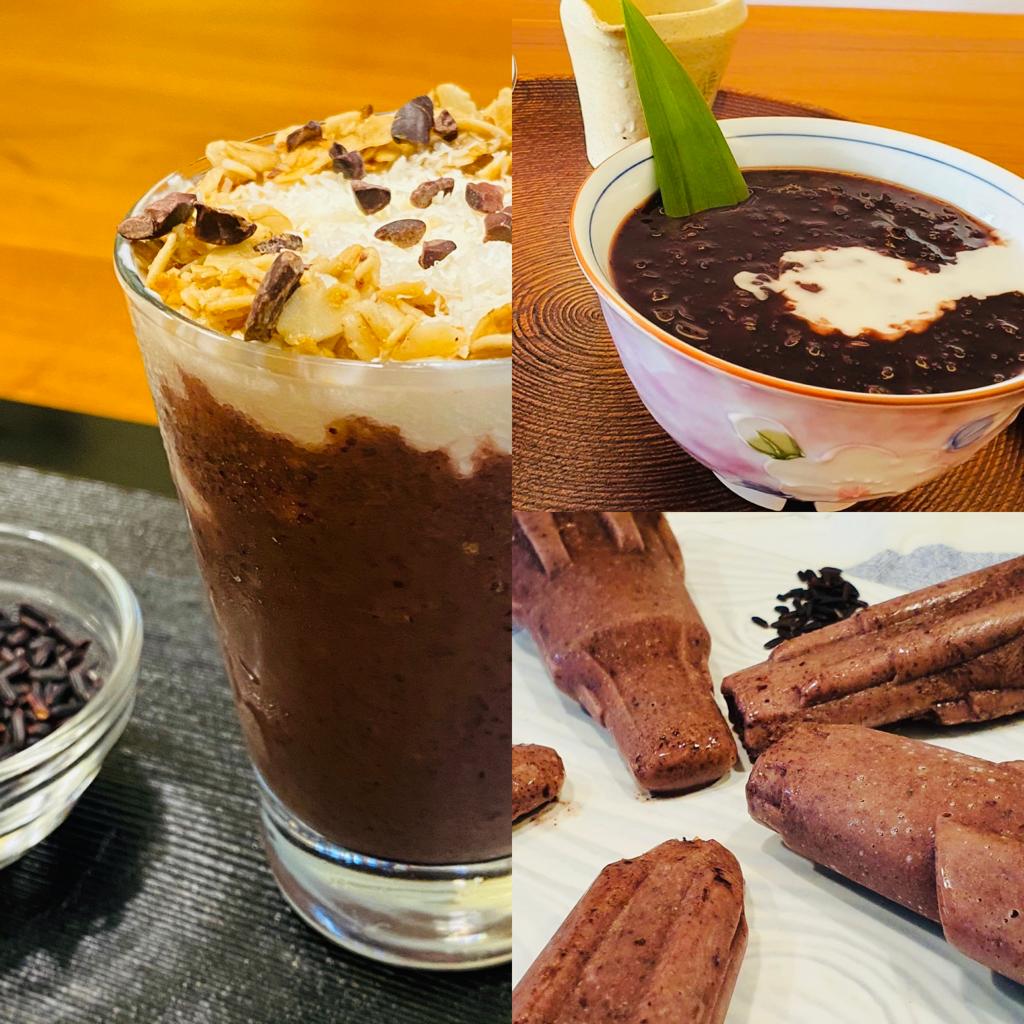
Using a basic Bubur Pulut Hitam recipe there are 3 different ways you can enjoy this healthy, gluten-free and no-bake dessert — warm, chilled as a wonderful chia seed pudding or frozen as popsicles.

Dessert 1: Bubur Pulut Hitam (Black Glutinous Rice Porridge)

What you’ll need

(Serves 2-4)

  • 1 cup (180g) black glutinous rice
  • 5 cups water
  • 1 small block palm sugar (can be substituted with 90g brown sugar)
  • 4 pandan leaves, tied into knots
  • ¾ cup coconut milk
  • ¼ teaspoon salt

How to make it

  1. Soak and wash the black glutinous rice thoroughly until the water runs clear. If possible, cover in water and soak overnight.
  2. Add the pandan leaves and water. Bring to a boil.
  3. Boil covered for 40 minutes over medium heat.
  4. Meanwhile, melt palm sugar over low heat. Add the palm sugar into the porridge and mix well.
  5. Turn the heat down to medium-low and boil for another 10 to 15 minutes.
  6. Add the salt, stir and let the mixture come to a simmer. Turn off the heat.
  7. Drizzle coconut cream when serving. Serve warm or cold.

Dessert 2: Black Glutinous Rice Chia Seed Pudding

What you’ll need

  • Black glutinous rice porridge (recipe #1, as above)
  • 1/2 cup coconut milk
  • Chia seeds
  • Granola
  • Yoghurt

How to make it

  1. Blitz porridge in blender with coconut milk
  2. Pour into small glasses and add 1 tablespoon of chia seeds per glass
  3. Chill mixture for at least 20 minutes, then top with granola and yoghurt, while serving.

Dessert 3: Black Glutinous Rice Popsicles

What you’ll need

  • Black glutinous rice porridge (recipe #1, as above)
  • 1/2 cup coconut milk

How to make it

  1. Biitz porridge in blender with coconut milk
  2. Pour into popsicle molds and freeze overnight.
  3. Enjoy!

Notes:

  • Wash and rinse the rice thoroughly before washing
  • Palm sugar gives the dessert a fragrant, aromatic taste, but can be replaced with brown sugar as a subsititute
  • The coconut milk adds a creamy texture to the dessert and the amount can be varied, according to personal preference.

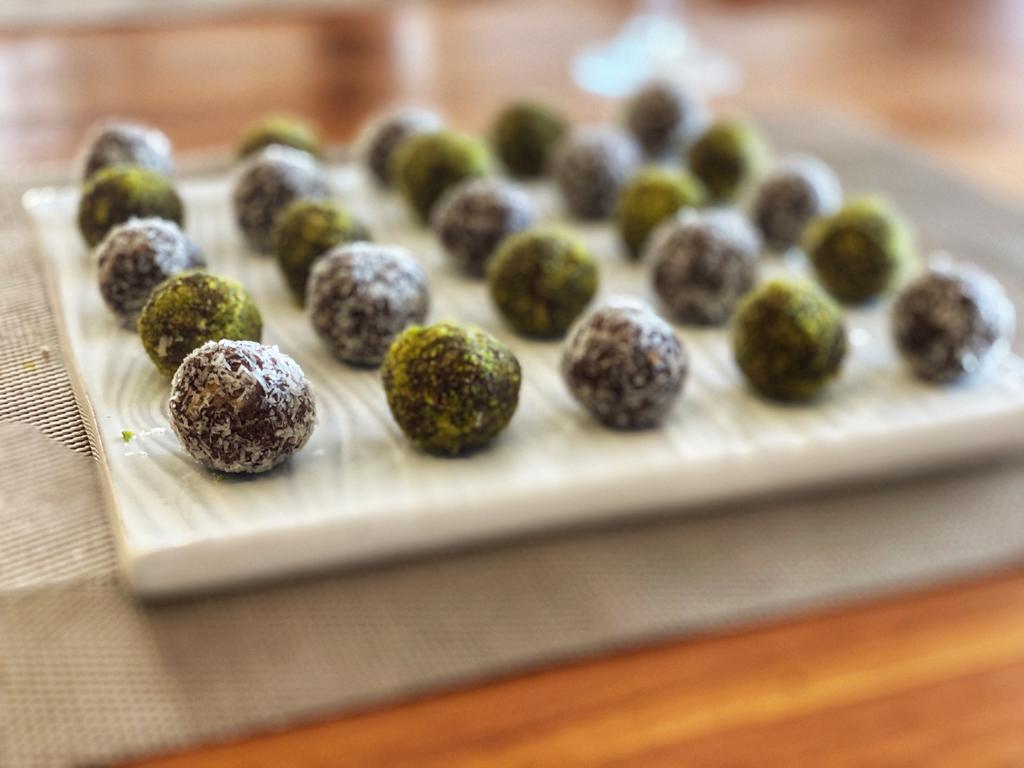
Chokladbollar

Swedish Chocolate Balls

It’s fika time! In Sweden the fika tradition is synonymous with taking a coffee break and having a snack with it. Even though they are commonly served in Swedish cafes, many Swedish families make Chokladbollar at home, because they are really easy to make. In fact, this is one of the first desserts Swedish children learn to bake during their childhood! This is a perfect no-bake gluten-free dessert, and you won’t be able to stop at one!

What you’ll need

  • 1 cup rolled oats, ground into a coarse meal
  • 1/2 cup unsalted butter (113 grams), softened
  • 40g granulated sugar
  • 3 tablespoons good quality cocoa powder
  • Optional: 1 teaspoon coffee powder
  • a pinch of salt
  • 1/4 cup dessicated coconut
  • 1/4 cup ground pistachios

How to make it

  1. Cream butter and sugar, then add cocoa powder and vanilla and cream until well blended.
  2. Stir in oats and salt
  3. Roll the mixture into small balls – about 1 tablespoon if you’d like them larger, about 1 tsp if you’d like them smaller.
  4. Roll half the balls in the dessicated coconut, and half the balls in the pistachio until fully coated
  5. Refrigerate for at least an hour, or freeze for 30 minutes before serving.
  6. Store in an airtight container. They will last in the fridge for a week or longer if kept in the freezer.

Notes:

  • Most Swedish recipes will call for coffee to be added, but this can be left out if you would like to make them more child-friendly
  • Get creative – add fillings like chocolate chips, caramel or coat the chocolate balls in rainbow sprinkles…!

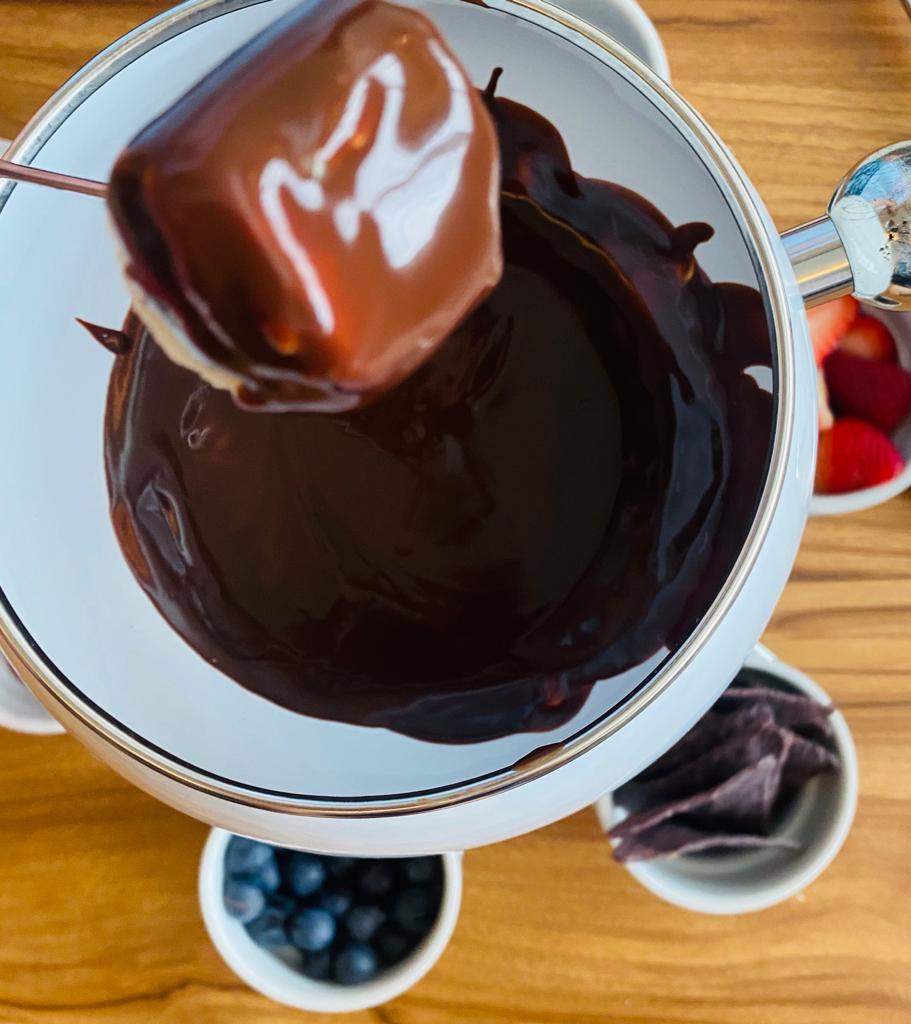
Chocolate Fondue Recipe

A simple and fun dessert idea that only takes minutes to make!

Did you know? The Chocolate Fondue was actually invented in New York City and not Switzerland.

Konrad Egli, a Swiss restaurateur in NYC, created it in the 1960s as he wanted to add a dessert version of the fondue to his menu. The rest, as you know, is history.

What you’ll need:

  • 180g high quality chocolate (dark or milk, depending on your preference
  • 80g heavy whipping cream
  • 1/2 teaspoon vanilla extract
  • pinch of himalayan or sea salt
  • Optional – 2 tablespoons kirsch, brandy or Cointreau (leave this out if you’re preparing a kid-friendly version)

How to make it:

  1. Put all the ingredients other than the liqueur in the top of your double boiler (or in a bowl of a makeshift double boiler).
  2. Heat the water to a simmer, then stir the chocolate constantly till everything is melted. Ensure no water gets into the mixture, otherwise the mixture will curdle.
  3. Add the liqueur just before serving and stir to combine.
  4. Put it into a fondue pot or ceramic dish, and serve with a variety of cut fruits, marshmallows and pretzels!

Pomegranate Molasses

Molasses of Pomegranate

An essential ingredient for Middle-Eastern cooking, you would be surprised at how easy it is to make pomegranate molasses and how versatile it is!

What you’ll need:

  • 2 cups pomegranate juice
  • 25g sugar
  • 1 tbsp lemon juice

What to do:

  1. Bring the pomegranate juice, sugar and lemon juice to boil in a saucepan over medium heat. When the juice boils, reduce the heat to low.
  2. Let the mixture simmer for about an hour, uncovered, stirring occasionally.
  3. To check if the molasses is ready, dip a spoon into the molasses. It is done when the molasses coats the back of a spoon.
  4. Turn off the heat and cool before pouring into a jar. The mixture will thicken as it cools.
  5. Store in fridge for 3-6 months.

Notes:

Use as a topping on ice-cream or yoghurt, to dress a salad or to marinate meats! You can also mix it with orange juice and soda for a refreshing mocktail!

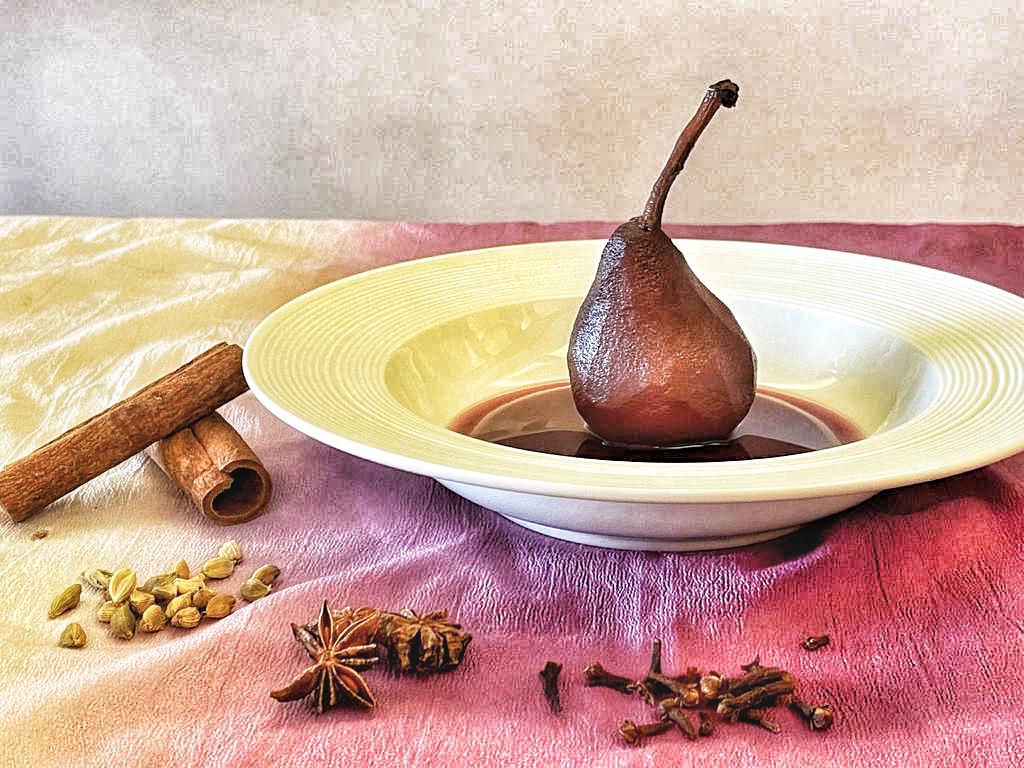
Poached Pears in Spiced Red Wine

Poached Pear in red wine and spices

Simple and elegant, this dessert accentuates the floral aroma of the pear, by simmering it in red wine and beautiful spices.

What you’ll need:

  • 5 medium sized firm pears (these were made with Packham pears)
  • 1 stick cinnamon
  • 8 whole cloves
  • 1 star anise
  • 6 cardamom pods
  • 2 cups red wine
  • 1 tbsp vanilla extract

What to do:

  1. Put the spices, wine and vanilla extract in a saucepan
  2. Bring the mixture to a simmer
  3. Peel the pears just before the poaching liquid is ready and add them in to avoid any discolouration
  4. Ensure pears can fit snugly in the saucepan as there needs to be enough room for the pears to be submerged.
  5. Poach the pears on low heat for 20-30 minutes, and rotate them every now and then to ensure they poach evenly on all sides, including the tops.
  6. Allow the pears to cool down in the poaching liquid, then remove the pears.
  7. Reduce the poaching liquid on low heat till it becomes a syrup, coating the back of a spoon.
  8. Serve pears chilled or at room temperature. Drizzle with syrup and serve with vanilla ice-cream, whipped cream or mascarpone cheese.

Notes:

  • For variations, add citrus peels or swop the red wine out for white wine
  • Do not overuse the spices, to prevent them from overpowering the pear’s sweet fragrance
  • Serve with walnuts or almond to give this dessert an additional layer of texture!